Thursday, July 30, 2020

Two ways to set dynamic Style in lightning component

In this post I will tell you two ways to set dynamic style values in lightning components.


1.)  Use aura:html :

 you can use aura:html to give dynamic style to the lightning component . You can give a custom property (--textColor : black; ) in the component (between aura:html with style tag) and access  these values in the style bundle ( var(-- textColor) ) to set dynamic style. Refer below example to understand it more clearly :


  Component :


                       <aura:component >

                            <aura:attribute name="TextColor" type="string" default="red"/>
                            <aura:attribute name="Font_Size" type="string" default="100"/>
                            <aura:html tag="style">
                                :root {
                                --textColor: {!v.TextColor};
                                --FontSize: {!v.Font_Size+'px'};
                                   }
                            </aura:html>
                           <div class="Dstyle">Hello World</div>

                       </aura:component>

    I am taking the default value . You can set any valid value by controller.


     Style :


           .THIS.Dstyle{
                  color: var(--textColor);
                  font-size: var(--FontSize);
              }


    Output :

                                        
Hello World

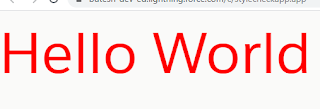
 In this example attributes are defined with default value and set this attribute in custom  property which is defined in aura:html. Use this custom property in style tab to give style  to lightning component


2.)  Use attributes directly in the style tag .

Refer below example to understand it more clearly :


 Componet :


                          <aura:component >

                                 <aura:attribute name="Font_Size" type="string" default="100px"/>
                                 <aura:attribute name="TextColor" type="string" default="red"/>
                                 <div style="{!'font-size:' + v.Font_Size + ';' + 'color :' + v.TextColor  }">                                                                                                                        hello world </div>
                          </aura:component>


  Output:

                           
Hello World1

       In this example attributes value are directly used in style tag.            


  Easy Right....!!
  Thanks,
  Lovesalesforceyes.

Sunday, July 12, 2020

Send email on daily basis in salesforce(With Schedulable Apex)

Problem :  How to send email on a daily basis to someone with salesforce.

Solution : First you have to write schedulable apex class.

                 Here is the code of simple code of schedulable class. Messaging is                    the namespace and SingleEmailMessage is the class. setSubject                    and setPlainTextBody are the methods of this class.


                 global class test1 Implements Schedulable
                      {
                           global static void execute(SchedulableContext sc)
                                {
                                     sendmail1();
                                 }
    
                          public static void sendmail1()
                               {
                                    string s='XYZ@gmail.com'; 
                                    Messaging.SingleEmailMessage email = new                                                                                                                                                 Messaging.SingleEmailMessage();
                                   string [] toaddress= New string[]{s};
                                    email.setSubject('Lovesalesforceyes');
                                   email.setPlainTextBody('salesforce blog');
                                    Messaging.sendEmail(New Messaging.SingleEmailMessage[]{email});
                                 }
                          }


            Then you have to set this schedulable apex on a daily basis . For this :


            1.) In setup write apex class.
            2.) Click on schedule apex as shown below :

                
apex class

             3.) Fill all the required fields.

              
schedule apex

    In apex class you have to give schedulable apex classselect start date, end     date and days according to your requirement and save it. That's all
 

   Thanks,
   Lovesalesforceyes.


Saturday, July 11, 2020

Applying Lead assignment rule when inserting bulk data from data loader (Trigger solution)

Problem : When inserting lead from data loader lead reassignment rules are                        not working on records.


solution : when you are using lead assignment rules you have to check the                        checkbox Assign using active assignment rule on lead and it                                 works fine . 


Assignment Rule

Problems arise when you have to insert bulk data. In this case the lead assignment rule does not work . 

So what i do i found this solution by writing after insert trigger on lead . I use apex DML operation. Here useDefaultRule  is the default assignment rule set by the user. 


Here is my code :


,
                   Trigger onAfterInsert on Lead(After insert)
                    public static List<Lead> leads = new List<Lead>();
                        {
                            for (Lead l : Lead_ids)
                                {
                                    leads.add(new Lead(Id = l.Id));
                                }

                             Database.DMLOptions dmo = new Database.DMLOptions();
                             dmo.assignmentRuleHeader.useDefaultRule = true;
                             Database.update(leads, dmo);
                        }


  Thanks,
  Lovesalesforceyes.

Sunday, July 5, 2020

What is APEX in salesforce With use case and features.

Today we are gonna start with the development part. We are now starting with the apex basics.  How to code in Salesforce using apex visualforce and lightning. So let's begin.

I'm gonna talk about four points first one apex basics in this topic I'm gonna discuss that what exactly apex is and how to write it and where it gets executed how it gets saved how it gets compiled and all the different things related to it.Then the second point is flows of action in which I'm gonna tell you that how developer writes a code how it gets saved to the server and how it gets compiled and executed and all the related things with it. Then the third point is to be ready to use apex like when to code and when not to code. I'm going to discuss those points because it's necessary. Salesforce administrators are the people who are using pertinent tools to develop the applications on salesforce , so when there is a need to choose apex over the point and click tools I'm gonna explain that. After that I'm gonna discuss the fourth point is that what are the features that are not supported by apex or what things we cannot do using apex and then the last one some features about apex so let's start. 

Apex

Apex is basically a strongly typed object-oriented programming language which is used to develop applications on top of the Salesforce platform. Using apex you can write the custom business logic on top of the Salesforce platform which can be executed on different occasions like on a button click or if you want some custom code to be executed, you can use apex. One point that you need to consider with apex or while programming in apex is that apex is saved,compiled and executed on the force.com platform or on the servers of the force.com platform not on the client system or on the client device that's your laptop or your computer, simply means that you do not need to install any development kit compiler or on your client system. All you need is a browser and an internet connection to write the apex code.

Let's start with the flows of action that are involved when it comes to apex. In apex the flows of action are divided into two parts. The first one developer action is for the developer and the second one is user action which is for the end user or the business user developer action. Developer writes an apex class or an apex code into his computer or laptop then the apex class or apex code goes through the internet to the force.com platform servers and there are two components one is the apex compiler and the other one is an apex at runtime. So an apex compiler compiles that apex class of the apex code and stores that compiled epics into the data storage and while the labels compiler is compiling the code if there is any error then it returns that error to the developer. The code will never get saved until there are errors in that particular code. As a compiled apex on the server side you have the force.com platform which has an application server and the second thing is data storage and on the client side all we need is a browser and an internet connection.

Now let's talk about the second flow of action that is end user action. In end user action it is basically for the end users or the business users who were using that particular application or executing that particular apex class or apex pool. So what happens is that whenever they invoke a particular apex, a request goes to the force.com platforms application server which includes two things: an apex compiler and the second thing is apex run time. So the request goes to the apex run time it fetches the compiled data from the data storage and it executes it on the force.com platform and returns the result back to the end user. So these are basically the flow of actions that are involved with apex.

Now let's talk about the third topic. Basically when to use apex, the first and important requirement occurs when you want to do Automation that cannot be implemented using workflows or process builders. In that case you have to write in apex code or basically an apex trigger. The second thing is that you need to write down a apex whenever you need to implement complex validation rules. For an example, you want to validate that the account that you're creating does not have an email or phone number similar to any of the accounts that you have available. So in that case you cannot implement this validation rule using the click validation rules. You have to implement this validation using Apex triggers that are basically in Apex code. The third situation in which you need to use apex is a web service like whenever you want to create web services to interact with external applications, we need to use apex or if you want to create email services then also we need to write apex code. The fourth thing whenever you want to do certain transactions and you want to control those transactions using some save points and rollbacks, we can use apex but always make sure that if a certain functionality is implementable using the point-and-click tools or the declarative approaches you should go with that. Never write an apex class or an apex code for the thing that you can do with the point-and-click tool. Only write the apex code or the apex class when a certain functionality can not be implemented using the content click tools because there are multiple reasons involved with it like apex is not available in professional edition, governor limits code is not maintainable as compared to the point a click tools or declarative approaches and many more.

Now let's quickly come to the point, in which conditions you cannot use apex. so the first thing that we cannot do using apex is that we can not show anything literally anything on the UI or on the user interface using apex except the error message of course. The second one, the most important point that you need to consider is that using apex we really cannot change any Salesforce functionality. We can only add new functionalities and stop the execution of the existing functionality on particular actions but we cannot change the standard Salesforce functionality. Third thing apex cannot be used to create a temporary file. So that means you do not have to worry about file handling anymore. Fourth thing you cannot create multiple threads using Salesforce or using Apex in Salesforce. Threading is not allowed. So again you do not have to worry about multiple threading.

Now let's begin with the fourth point. some features of Apex: 

1.) The first one is, apex is case insensitive. Yes it is really case insensitive.

2.) second point it upgrades automatically. You do not have to worry about upgrading your  development kit or your compiler or your interpreter. It automatically upgrades.

3.) The third thing is that it is object oriented programming language and it has Java or C sharp like syntax. So it's very very beneficial for all of you guys who have a background of Java or C sharp.

4.) Fourth and probably the best feature Salesforce supports is that it is very easy to test, because it provides built-in support for all functionalities to write and execute the test cases.

5.) Fifth it runs on a multi-tenant environment which is an advantage as well as a drawback  advantage because you do not have to worry about your own infrastructure and maintaining  your own infrastructure and drawback because there are no limits involved, so that you do not monopolize the resources of the server.

6.) Sixth and the last point is the version. yes apex class or apex code is version that means the code saves with a particular version of apex and it executes that particular version only.

And that's all about the apex basics and fundamentals that you need to know.


Thanks.
Lovesalesforceyes.


Saturday, July 4, 2020

How To Create Custom Community User In Salesforce With Example

Complete these steps in salesforce classic to create community users.

1.) Create one new Account related Contact.


Contact

  • As here I've created one Contact Dr.XYZ with an Account name GOOGLE.


2.) Click on manage external user on contact detail as shown below.


External user

3.) Then select Enable Customer user as shown below.


Enable custmor user

4.) After selecting Enable Customer user , the New user window is open as shown below.


New user

5.) Fill all required fields. Enter email , username and nickname will automatically be filled. From  User License chose :

  • Client Customer Community
  • Client Customer Community Plus
  • Client Customer Community Login
  • Client Customer Community Plus Login

    From Profile Chose:

  • Client Customer Community
  • Client Customer Community Plus
  • Client Customer Community Login
  • Client Customer Community Plus Login

User Licence

6.) After filling all required fields, save your changes as shown below.


user

7.) That's all . Your custom community user is ready. Go to contact details, click on manage external user  and then select "login to community as user" to login community as custom user as shown below .


Community as user


Easy Right...!!!


Thanks,
LoveSalesforceYes


Get selected radio button value in LWC

This post explains how to get selected radio button in LWC. Below is demo of output : To use the radio button in LWC you have to use the  li...